Photogram
How to Make a Photogram
1. Set up your enlarger to be at F11 or F8, making sure your filter is on 3.
2. Raise or lower your enlarger lamp for an area larger than 5x7 paper and focus
3. Set your timer to 3 seconds.
4. Make sure to turn off your lamp
5. Take a piece of photo paper and centre is under where your light will shine.
6. Place all objects on top of the paper, according to your design.
7. Take a piece of cardboard, cover 2/3rds of the paper and press your timer light After the timer goes off, move the cardboard to cover the second 1/3 of your paper and press the timer light again. When the light goes off, completely remove your cardboard and hit the timer light for a third time
8. You are now ready to develop your test strip.
9. Once you have assessed how many seconds would be best, set your timer to that amount of time. Place a new sheet of photo paper down with your objects on top of it again and hit the timer once.
10. You are now ready to develop your print.
How to develop your print.
1. submerge your print in the developer for 2 minutes. This will give it enough time for your print to darken.
2. submerge in the stop liquid for 1 minute. This will stop your print from darkening from the developer.
3. submerge your print in the fix for 4 minutes. this will stop your print from being affected by light.
4. place your print in a water bath with fresh running water for 5 to 10 minutes. This is to get rid of all of the chemicals.
My Photograms
My first photogram was purely experimental, I did not set a timer on my enlarger therfore I could not precisely record how many seconds my test strip was exposed to light. However it allowed me to try to submerge my test strip into the chemicals for the first time and consequently allowed me to familiarise with the different chemicals in which my test strip was submerged in.
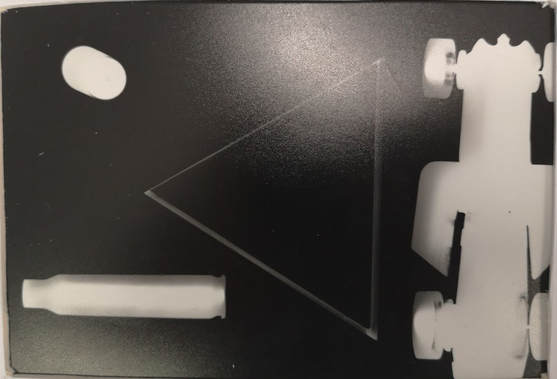
For my second try I split my test strip into 3 sections, I then went on to expose each part of my test strip to light for different amounts of time. The side with the earphones was exposed to light for 9 seconds, the middle part with the paper holder and the bubble wrap was exposed to light for 6 seconds whilst the last section, with the pen was exposed for only 3 seconds. In this photogram you can clearly see the affect of exposing the light sensitive paper to light for different durations of time. The longer the strip has been exposed, the darker and more over exposed the paper is. The first section where it had been exposed for 9 seconds was clearly over exposed as the earphone itself had become shaded black due to too much light. The middle part was still slightly overexposed as the bubble wrap has nearly completely disappeared, this is because its a see-through object therefore light can still travel past it with ease an don't the paper. The last section was correctly exposed, with only 3 seconds of exposure.
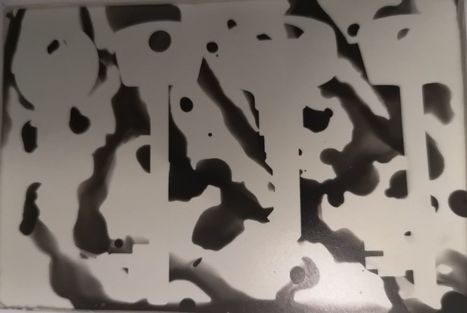
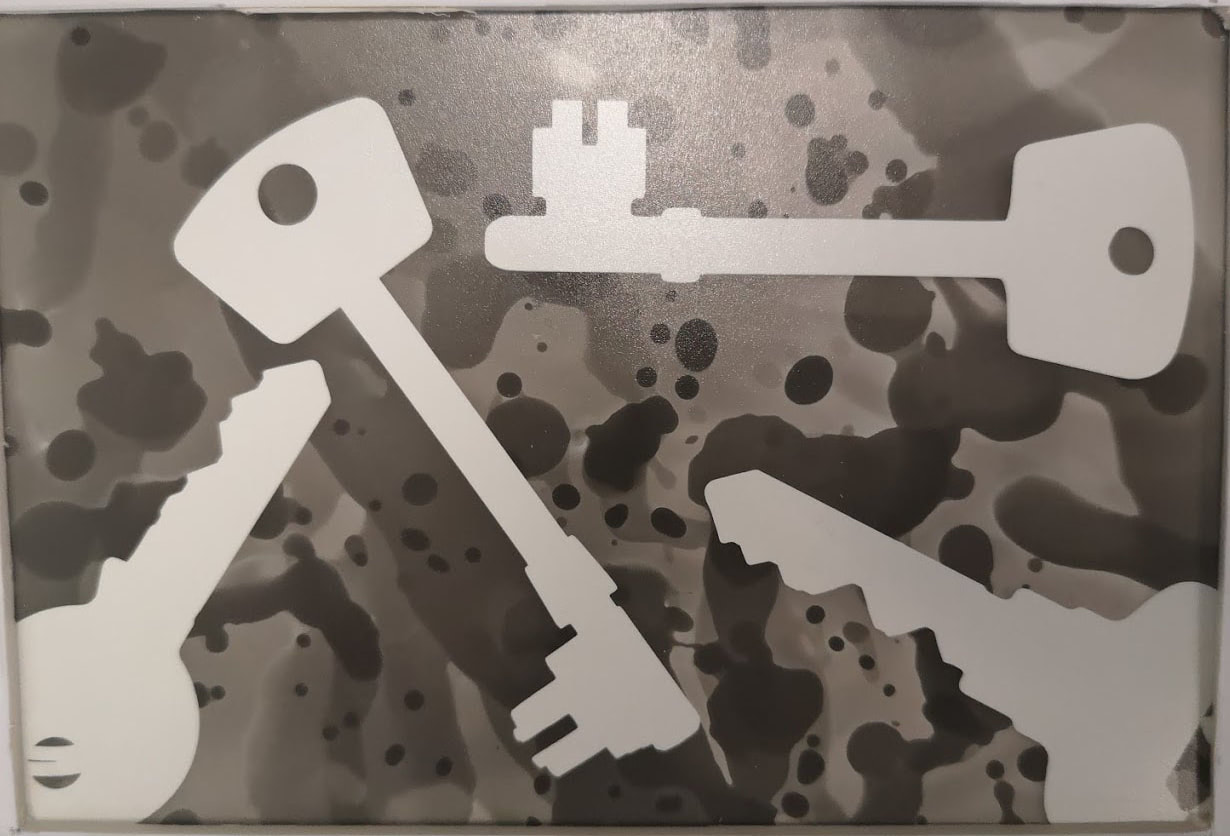
After deciding the best exposure times with my previous photograms, I decided to create a different type of photogram. I exposed my light sensitive paper to light for 5 seconds, as I had previously done, however, this time I splattered my developer on with a paintbrush and left it to darken for two minutes. This gives my photogram an abstract look, as it leaves patches on the light sensitive paper. I then placed my photogram in the stopper and fixer as normal.
|
|
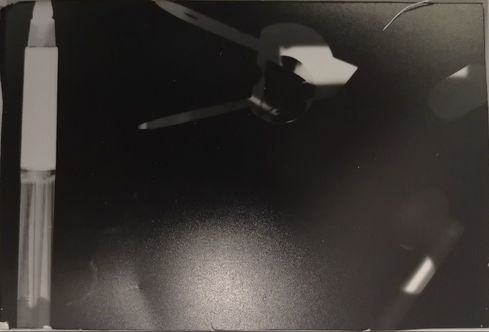
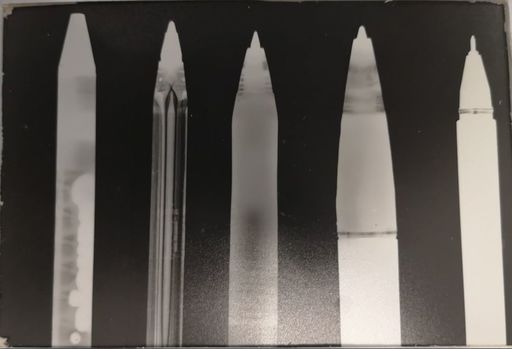
For my third try, i decided to have a theme. I decided to use different types of pens all lined up. It is interesting to see how the different opacities of the pens affect how light can pass through and consecutively alter the photogram.
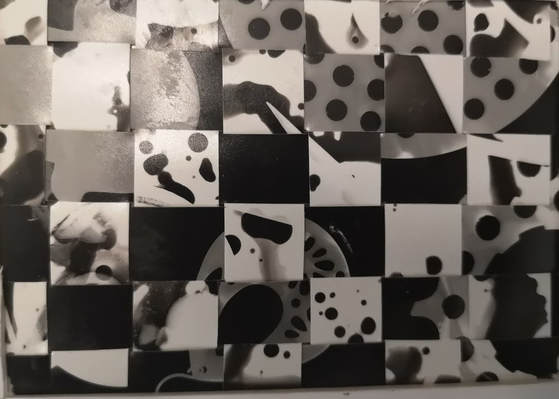
My last photogram is a mixture between solarisation and weaving. Solarisation is when the light sensitive paper is exposed for half the amount of time. Once exposed, the light sensitive paper is then submerged in the developer for half of the normal time and then is taken out again to be exposed to light for the second time. After the second exposure the light sensitive paper is developed, stop and fixed as usual. For this particular photogram i also decided to cut up two photograms and weave them together. \This gives the photogram an abstract look as it is mixing two different pieces of work together.
How To Make a Pinhole Camera
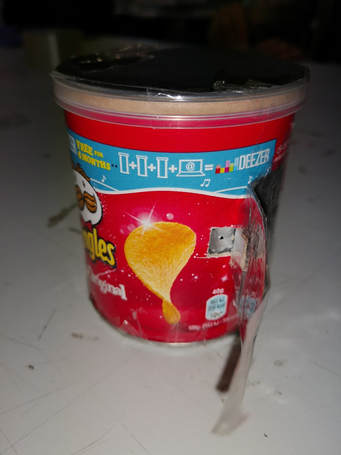
- Use a small pack of Pringles and black out the inside and he lid using black paper. (this is so there is no light reflection or leakage from anywhere)
- Cut out a 1cm x 1cm hole in the middle of the camera.
- Cover the hole with tin foil form the inside.
- Poke a hole with a needle in the tinfoil.
- Use a black sheet of paper to use as a flap to cover and expose the hole to light.
- Place light sensitive paper inside the camera and close the lid.
What is a pinhole camera?
The concept of creating a pinhole camera was to capture images using light sensitive paper. Unlike an actual camera, the light sensitive paper acted as a sensor to capture the light. The aperture of the pinhole camera is fixed so we had to work with the exposure time, (shutter speed) to capture an image. I loaded the pinhole with light sensitive paper in the darkroom, then headed outside to try and capture an image. I placed the camera on a table and opened the flap for 7 seconds then closed it. Once back in the darkroom, place the light sensitive paper in the developer until it darkens, then in the stopper and finally the fixer.
The concept of creating a pinhole camera was to capture images using light sensitive paper. Unlike an actual camera, the light sensitive paper acted as a sensor to capture the light. The aperture of the pinhole camera is fixed so we had to work with the exposure time, (shutter speed) to capture an image. I loaded the pinhole with light sensitive paper in the darkroom, then headed outside to try and capture an image. I placed the camera on a table and opened the flap for 7 seconds then closed it. Once back in the darkroom, place the light sensitive paper in the developer until it darkens, then in the stopper and finally the fixer.
My photographs with the pinhole camera.

|

|
After several attempts, i finally managed to capture two different types of pictures, one landscape and a portrait. Naturally the portrait was more challenging to create as the person had to stay completely still for 7-15 seconds to avoid motion blur. I had to attempt this task many times as it was challenging to find the right exposure time as it would varie from indoor to outdoor and between shade and direct sunlight. Many of my attempts ended up being completely black due to overexposure.
Film Camera
A film camera is similar to the pinhole camera in the way that it captures photographs. In a pinhole camera, the light is allowed to pass through a single hole and hit the light sensitive paper to create an image. In a film camera, the light passes through a lens. The size of the hole in the lens and how long the hole is opened can be changed; this is called aperture and shutter speed. The light is then allowed to hit the film and creates an image.
To develop a film, the following items are required:
- Developing tank/container, top and lid
- Film spool
- Spool funnel
In pitch black, unravel your film from its case. Without touching the front and back of the film, insert the film into a film spool. Once all of the film is reeled in, cut the end. This process must be done in pitch black, as the film is still light sensitive at this point.
Place the film spool into a developer tank. Some developer tanks hold only one film spool at a time whilst others hold multiple at once.
Set your chemicals up in advance, ensuring that you have the right amount of film developer, stop and fix to fill the tank to the required level, which depends on the number of films. A single film spool takes 300ml of solution, but if developing two films at once, double the amount so there is 600ml.
Use a timer to ensure that the chemicals are in for the right amount of time. Shake the container every minute for 10 seconds to make sure all of the film is submerged in the chemical and to avoid air bubbles.
The timing of the film developer will depend on the type of film being used and ISO so check on the container.
Once developed, stopped and fixed, hang up the film to dry.
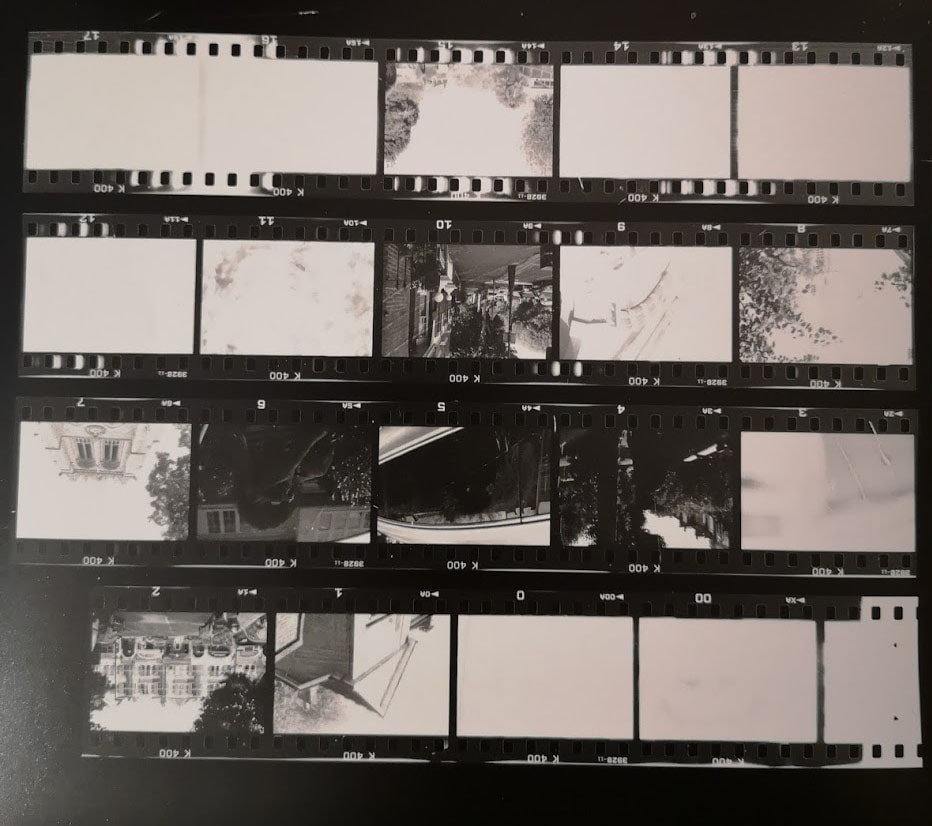
Contact sheet of my film
As visible in the contact sheet, many of my pictures were overexposed. This is because too much light was exposed to the film due to my shutter speed being too slow or because the aperture was too large. Another fault is that i opened the camera before rolling the film back in. This caused the last 3 pictures to turn out completely black (white as it is a negative) as it was exposed to light directly.
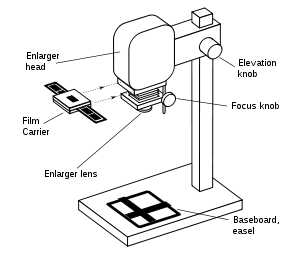
Creating the Photograph
In the enlarger, there is a slot for the negatives to fit in. This slot allows the negatives to fit in and the picture is projected upside-down. As usual I did a test strip to try and figure out the best exposure time for the enlarger to flash the picture onto the light sensitive paper. I exposed the test strip to light in 2 seconds intervals and I found that I had the best exposure at 6 seconds.
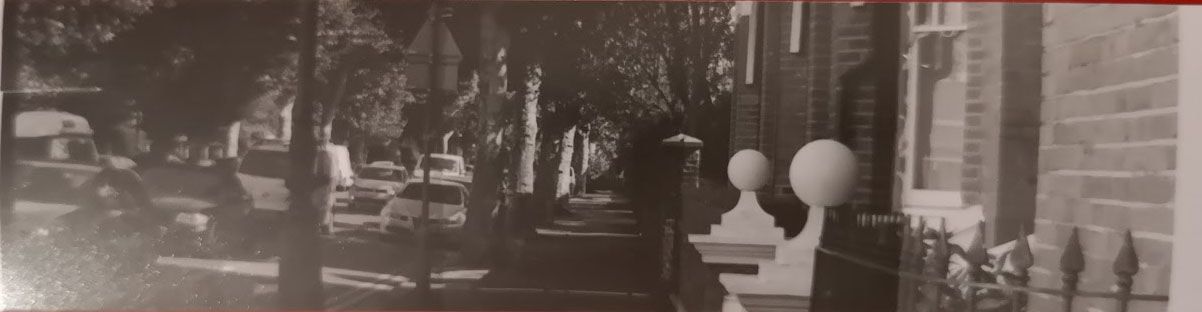
This was my test strip. In this image you cant clearly see the division in exposure
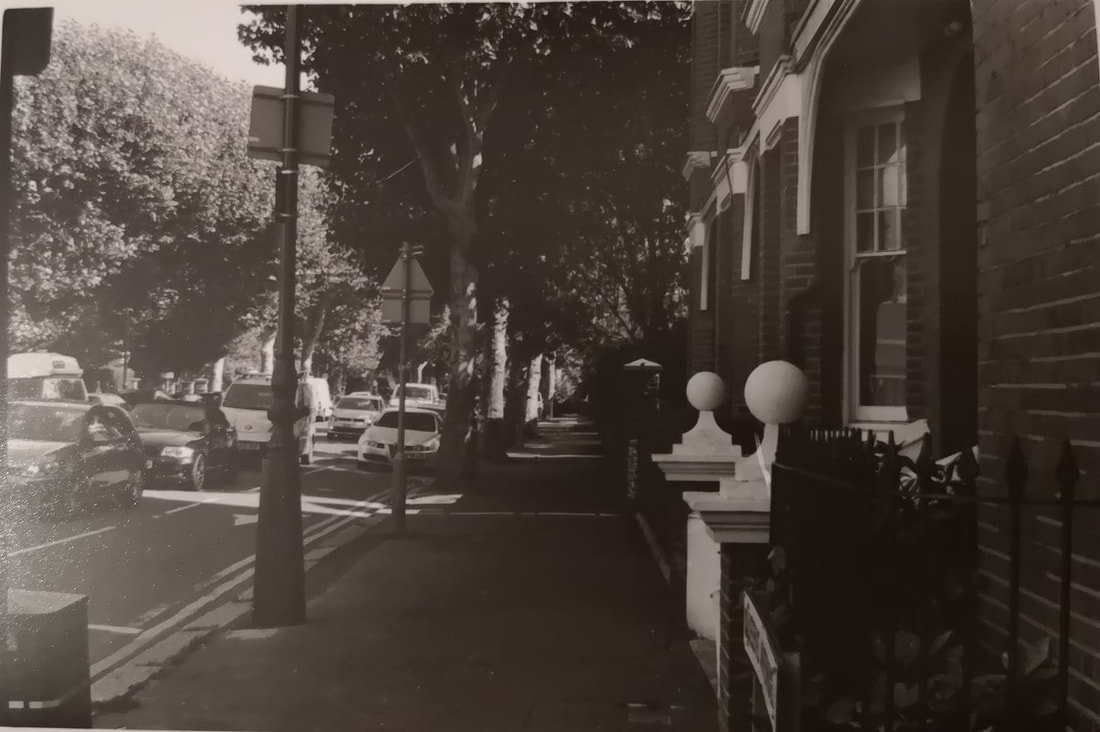
My final image
